Chunta簡単キャプション付与
Presented by ChuntaWeb
ダウンロードはこちらから
申し訳ありませんが使用して起きた全ての問題は自己責任になります。
ご了承ください。
v1.1.0 zipでダウンロードする
v1.0.0 zipでダウンロードする
バージョン情報
- v1.0.0 新規公開
- v1.1.0 色設定したRGB値のRとBが入れ替わる問題を修正
フォント色および背景色選択用のカラーパレットボタンを追加
上書き選択するしないのチェックボックスを追加
ソフトウェアについて About the software
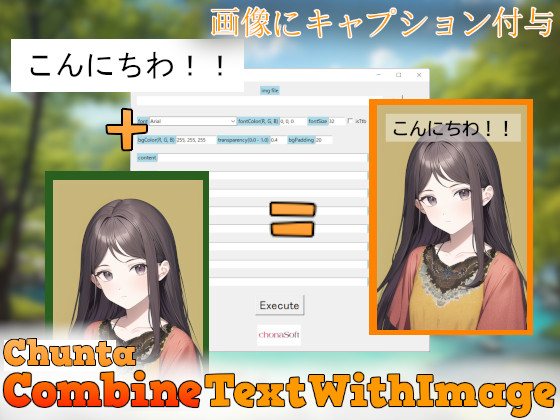
画像編集ソフトでキャプションを付けているけど地味に面倒くさい、そんなときに便利なソフトウェアです。
画像にキャプションを付与する作業に特化したシンプルな作りになっています。
OpenCVを利用しています。
主要な拡張子(png,bmp,jpeg,jpgなど)の画像は利用可能です。
透過pngも利用可能です。
This is convenient software for those times when you add captions with image editing software, but it's a little troublesome.
It has a simple design that specializes in adding captions to images.
I am using OpenCV.
Images with major extensions (png, bmp, jpeg, jpg, etc.) can be used.
Transparent png is also available.
注意 Note
64Bitマシンで動作します。32Bitマシンでは動作しません。ご注意ください。
Works on 64Bit machines. Doesn't work on 32Bit machines. please note.
使い方 Usage
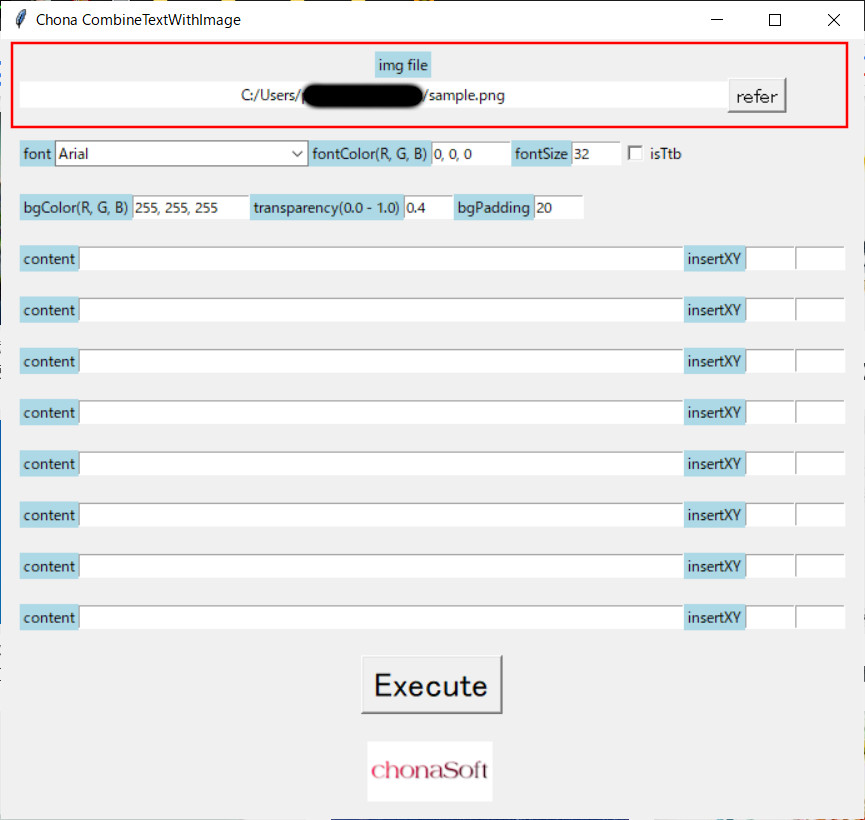
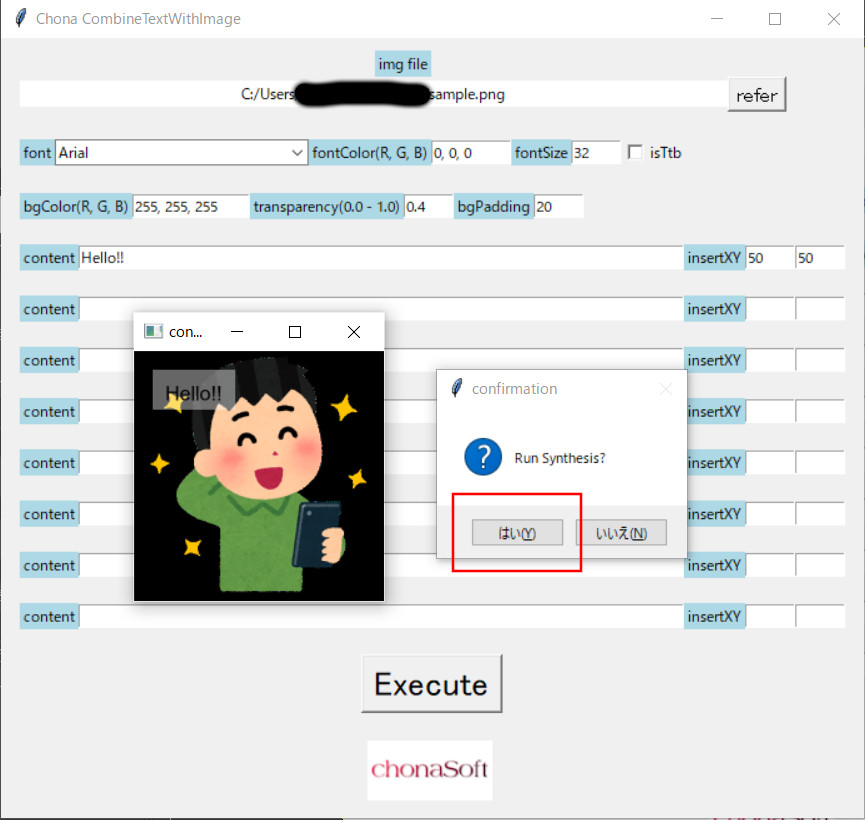
- 1. img fileのreferボタンで画像ファイルを選択してください。
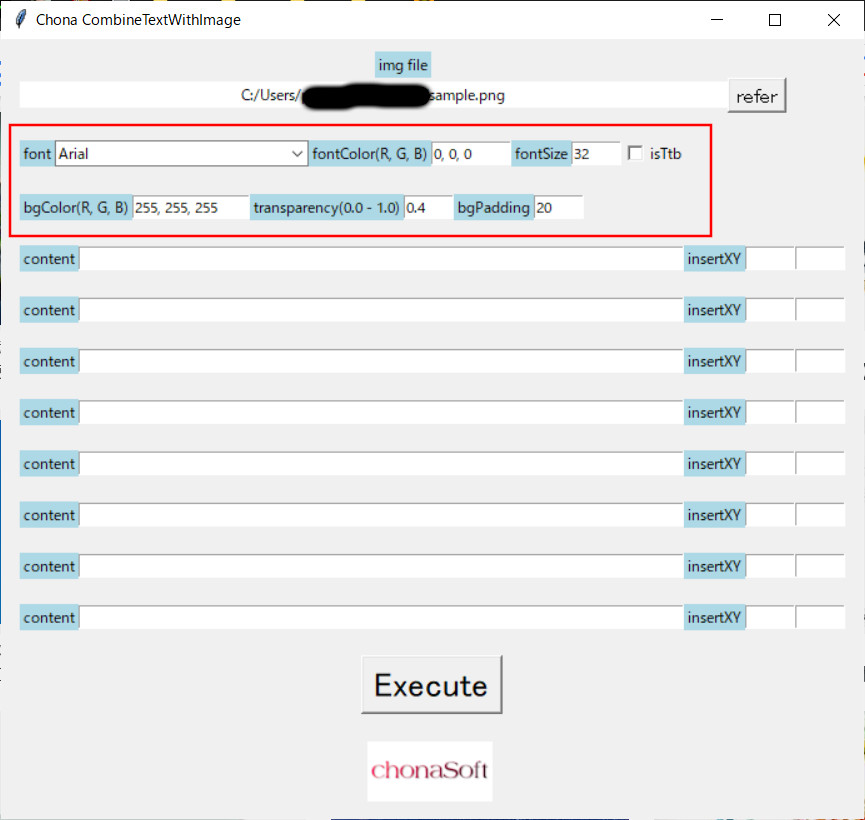
- 2. fontのプルダウンでフォントを選択してください。
※先頭に"日本語OK:"と書いてあるフォントは日本語が利用できます。
- 3. 必要に応じてパラメーターを変更してください。
fontColor(R, G, B): フォントの色(RGB)
fontSize: フォントサイズ
isTtb: チェックを付けると縦書き
bgColor(R, G, B): 背景色(RGB)
tranparency(0.0 - 1.0):背景色の透過度(1で透過しない)
bgPadding: パディング
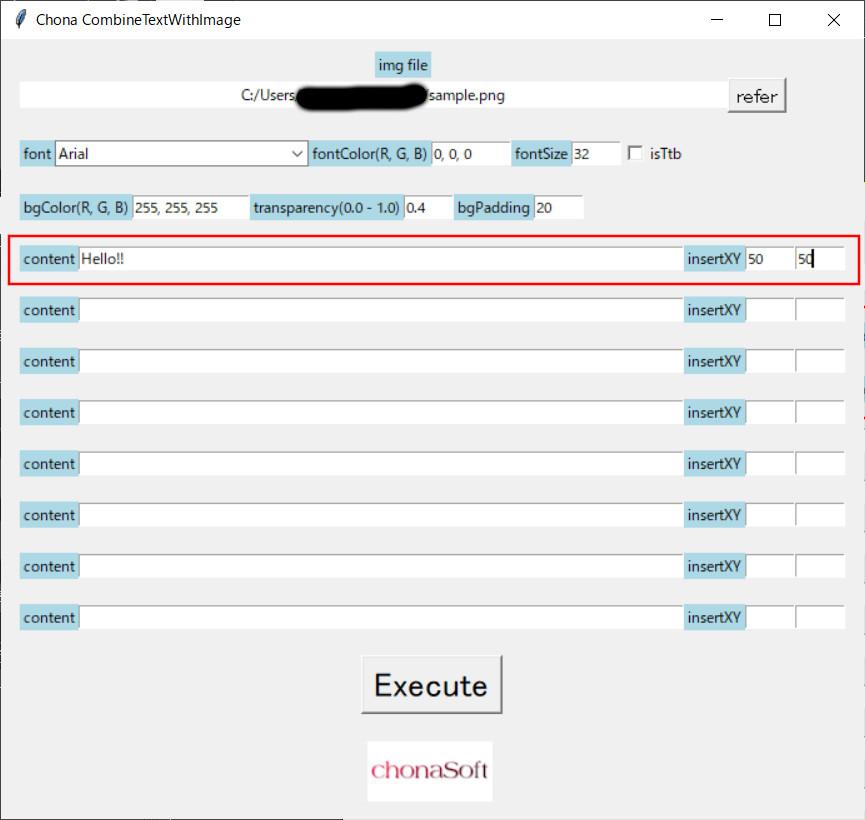
- 4. キャプションを入力してください。最大8個まで入力できます。
content: 文字
insertXY:挿入する位置X座標とY座標
- 5. Executeボタンを押してください。
完成画像の半分のサイズの確認用画像とダイアログが表示されます。
問題なければOKを押してください。
選択した画像ファイルの存在するフォルダに、"選択した画像ファイル名_synstr"の名前で画像が保存されます。
ソフトウェアの実行内容はexecute.logに出力されます。
- 1. Select the image file with the refer button of img file.
- 2. Select a font from the font pull-down.
*Japanese can be used for fonts with "日本語OK:" at the beginning.
- 3. Change the parameters as needed.
fontColor(R, G, B): font color (RGB)
fontSize: font size
isTtb: Vertical writing when checked
bgColor(R, G, B): Background color (RGB)
tranparency(0.0 - 1.0): Transparency of background color (no transparency at 1)
bgPadding: padding
- 4. Enter your caption. You can enter up to 8 characters.
content: characters
insertXY: Position X and Y coordinates to insert
- 5. Press the Execute button.
A confirmation image and dialog will be displayed at half the size of the finished image.
If there is no problem, press OK.
The image is saved with the name "selected image file name_synstr" in the folder where the selected image file exists.
The contents of software execution are output to execute.log.


紹介画像について
紹介画像にAI画像を利用しております。
AI images are used for introduction images.
Presented by ChuntaWeb


